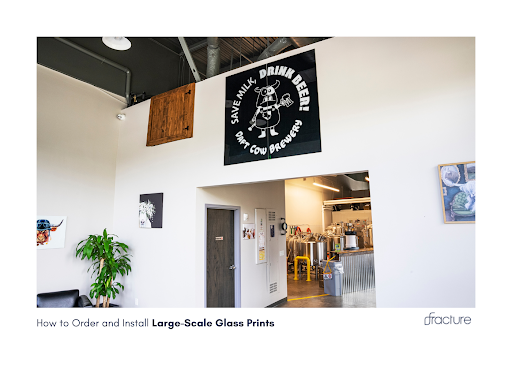

The most memorable commercial spaces create a distinct atmosphere.A custom glass print for wall installation can similarly change a standard lobby or office into a unique, high-impact environment that tells your brand’s story.
Executing a major art installation for a commercial project, however, requires precision and planning. From sourcing commercial glass printing services to managing the final large scale art installation, every step is critical. Our guide is your roadmap, providing clear instructions for ordering and installing large-format glass wall art to ensure your project is a stunning success.
What Are the Options for Large Format Digital Printing on Glass?
When you need to make a statement in a large space, size is a key consideration. Large-scale glass photo prints are designed to anchor a room and serve as a powerful focal point. The standard large sizes available offer significant presence on their own.
- Large Rectangle: At 15.6” x 20.8”, this glass print is perfect for making a statement in conference rooms or as part of a larger gallery arrangement.
- Extra Large Rectangle: Measuring 21.6” x 28.8”, the Extra Large print is a commanding piece, ideal for reception areas and main corridors where you want to capture immediate attention.
- Large Square: The 23” x 23” square format offers a modern, geometric feel that works exceptionally well in contemporary commercial designs.
B2B-Exclusive Sizes
For projects requiring even more dramatic impact, Fracture offers exclusive larger format options specifically for commercial and business applications. These oversized glass print photos are perfect for corporate lobbies, large conference spaces, and high-traffic areas where maximum visual impact is essential. To learn more about our exclusive B2B sizing options and discuss custom dimensions for your commercial project, please reach out to us directly.
Contact us to learn more about our offerings.
A common concern for large-format printing is image quality. Fortunately, the cameras on most modern smartphones are more than capable of capturing photos with enough resolution for even the largest standard glass print photos. You don’t need a professional photography budget to create stunning, large-scale wall decor.
Can You Get Custom Size Glass Art for Commercial Projects?
Some commercial projects have unique architectural features or require a full-wall mural effect that standard sizes can’t accommodate. So, are custom sizes an option for photo prints on glass?
For major commercial projects, the answer is often a conversation away. While a standard online ordering system might not list custom dimensions, providers like Fracture who specialize in glass pictures are often equipped to handle unique requests for large-volume or high-impact projects. The best approach is to initiate a direct client consultation for artwork to discuss your project’s specific needs.

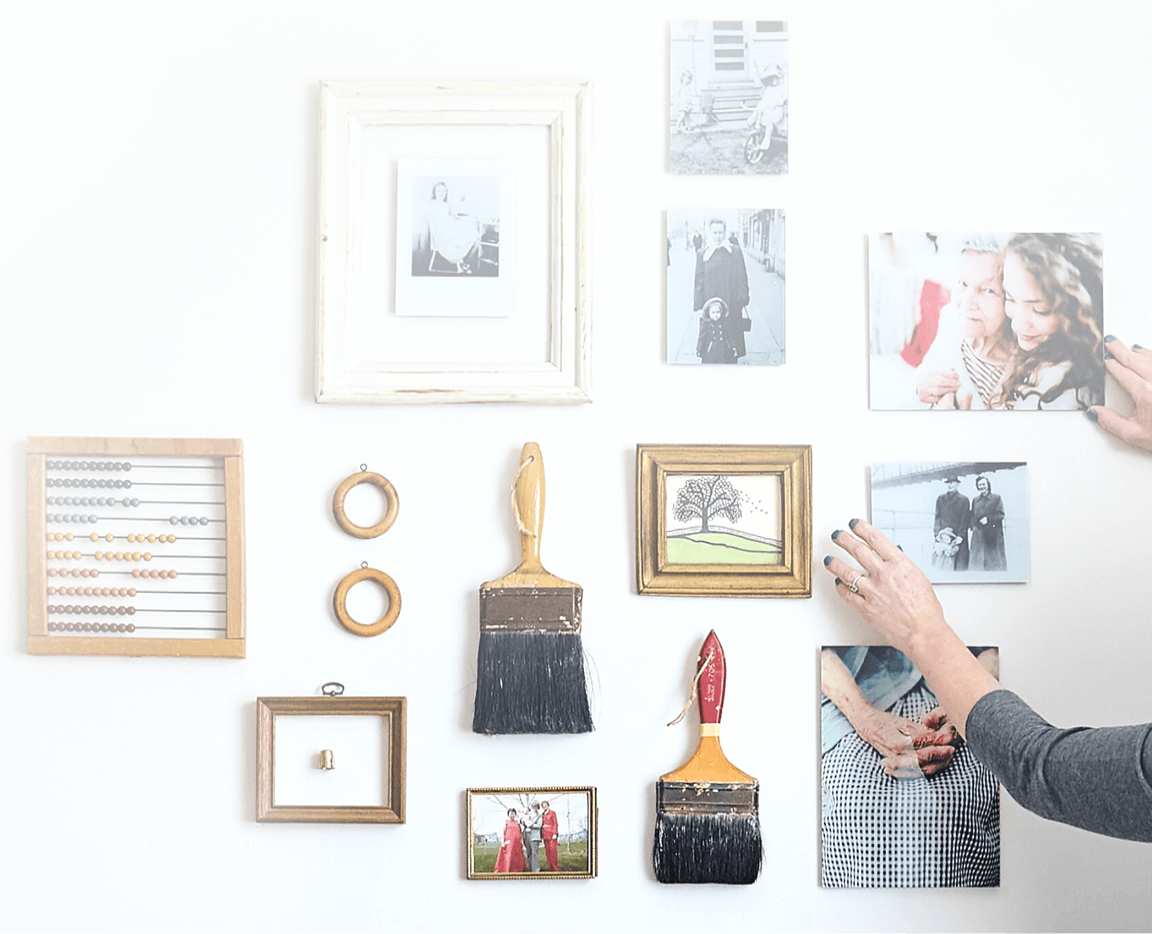
Another powerful strategy is to create a custom-sized mural effect by arranging multiple standard prints together. A grid of nine Large prints can cover a massive area, creating a cohesive image or a thematic gallery wall that feels like a single, monumental piece. Professional installation is key to achieving the seamless look of this method.
How Do You Go About Specifying Wall Art for Projects?
The quality of your final glass mosaic is directly tied to the quality of your source file. For large-format prints, preparing your image correctly is a critical step that ensures a crisp, professional result with excellent color accuracy in large format printing.
Resolution and File Type Requirements
Resolution: The gold standard for any high-resolution commercial prints is 300 DPI (dots per inch) at the final print size. For a 20-inch print, your image should ideally be 6000 pixels on its long side. However, due to the unique printing process on glass, high-quality images from modern smartphones often produce excellent results. For detailed guidance, you can always refer to the printing company’s file specifications.
File Types:
- For Photography: High-quality JPG or PNG files are perfect. Always use the original file from the camera or phone, not a compressed version sent through messaging apps or social media.
- For Logos and Graphics: While vector files (AI, EPS, SVG) offer the best quality and scalability, they need to be converted to high-quality PNG or JPG format before uploading to the printing system. When converting your vector files, export them at the highest resolution possible to maintain crisp, clean lines and text. If you only have a raster file (like a JPG) of your logo, ensure it is extremely high resolution to avoid pixelation on your glass photo prints.
Content and Color Preparation
Any text, logos, or graphic overlays must be part of the digital image file you upload. There is no option for engraving or printing messages separately on the glass print itself. Work with a graphic designer to create a final, flattened image that includes all the elements you want to display. For color, most images are in a standard sRGB color profile, which works perfectly for glass printing.
What Is the Process for Ordering Custom Prints Online at Scale?
Pulling off a large-scale commercial install can feel like planning a heist—think Ocean’s Eleven, but with less tuxedos and more tape measures. From site surveys to timing deliveries with contractors, every piece has to fall into place for things to go smoothly. That’s where our shipping and delivery process comes in—your behind-the-scenes partner making sure every detail is handled.
One of the biggest concerns for project managers? Getting oversized, delicate-seeming pieces safely to the site. That’s where our packaging steps up. Each glass photo print, no matter the size, gets its own snug, custom-fit box. For larger orders, those boxes are grouped into reinforced master cartons for even more protection.
When you place a large order, you can expect:
- **Clear Glass Print Production Timelines: Most orders ship within 3-7 business days, but you should allow for a slightly longer lead time for very large or complex commercial projects.
- Shipment Tracking: You will receive tracking information to monitor your order’s progress and coordinate its arrival.
- Delivery Coordination: For large palletized shipments, you may need to coordinate with the shipping company to ensure your site is ready to receive the delivery.
How Do You Manage a Large Scale Art Installation?
Proper installation is the final, crucial step to ensuring your glass prints for wall displays look professional and remain secure for years. While the process is straightforward, the size and weight of large prints demand care and attention to detail.
Step 1: Pre-Installation Site Check
Before you even pick up a tool, inspect the wall to determine the best mounting approach for your glass photo prints.
- Check Wall Type: Identify whether your wall is drywall, concrete, brick, plaster, or masonry. The included Wall-Dog™ screws work directly in standard drywall without any pre-drilling or anchors needed.
- Consider Your Wall Surface: For concrete, hollow or grout-filled concrete masonry, brick, and plaster walls, you’ll need to pre-drill a hole using a 3/16″ ANSI bit before inserting the Wall-Dog™ screw.
- Evaluate Wall Condition: If you’re considering the wall tape mounting option, ensure the wall surface is clean and not freshly painted (within 7 days) or heavily textured. Wall tape works best on smooth, properly cured surfaces.
- Stud Location (Optional): While the Wall-Dog™ screws provide secure mounting in drywall without hitting studs, you may choose to locate studs for additional peace of mind, especially for larger prints in high-traffic commercial areas.
- Check for Obstructions: Ensure there is no electrical wiring, plumbing, or HVAC ducting behind your chosen mounting points.
Step 2: Gather Your Tools
Having the right tools on hand makes the job smoother and safer. The good news is that Fracture glass prints come with everything you need to get started:
Required Tools:
- Phillips screwdriver (for screw mounting method)
- Isopropyl alcohol and clean cloth (for wall tape mounting method)
Optional Tools for Enhanced Installation:
- A high-quality level (a 4-foot level or laser level is best for large pieces)
- A measuring tape for precise placement
- A pencil for marking placement
- A power drill with 3/16″ ANSI bit (only needed for concrete, brick, or plaster walls when using the screw method)
The included Wall-Dog™ screws work directly in drywall without requiring any anchors, and the wall tape option requires no tools at all beyond cleaning the wall surface. This makes installation straightforward whether you choose the screw or adhesive mounting method.
Step 3: Mounting the Print
Your glass picture frames alternative will arrive with mounting hardware. For standard drywall, the included screw is often sufficient when driven into a stud.
- If Mounting to a Stud: Simply drill a pilot hole and drive the screw, leaving it out about a half-inch from the wall.
- If Mounting to Hollow Drywall: Do not use the included screw alone. You must use a proper drywall anchor, such as a toggle bolt or a self-drilling anchor, rated for the weight of the print.
- For Concrete or Brick: You will need a masonry drill bit and appropriate concrete or brick anchors.
Step 4: Leveling and Hanging
Once your screw or anchor is securely in the wall, hang the glass print. Then, place your level on top. Adjust the print until the bubble is perfectly centered. A slightly crooked large print is very noticeable and undermines the professional look you want to achieve.
Should You Use Professional Art Installation Services?
This is a common question for large commercial projects where time and liability are major factors. While printers (like Fracture) do not typically offer a direct installation service, they can provide all the necessary guidance for a successful installation.
For high-value, large-scale, or public-facing projects, hiring a professional art installer or a qualified local contractor is strongly recommended. The benefits are numerous:
- Expertise: They have experience with all wall types and commercial wall mounting systems.
- Insurance: They carry liability insurance, protecting you from any issues during installation.
- Perfection: They guarantee a level, secure mounting for high traffic areas.
- Efficiency: They can install multiple large pieces far more quickly than an in-house team.
Think of professional installation as an insurance policy on your investment in beautiful glass wall art.
What Makes Glass a Durable Wall Decor for Business?
The design philosophy of Charles and Ray Eames was that beauty and utility should be inseparable. We approach our commercial prints the same way. The vibrant, high-resolution imagery provides the aesthetic impact, while the durable, easy-to-maintain glass surface delivers the practical performance required for a commercial environment.

One of the best features of photo prints on glass in a commercial setting is their longevity and ease of maintenance. With minimal care, your prints will look as vibrant as the day they were installed for years to come. Simply use a standard glass cleaner sprayed onto a soft, microfiber cloth (never spray directly on the print) and wipe the surface. That’s it. No special chemicals or procedures are needed. Remember that these prints are for indoor use only and should not be placed in areas with direct, prolonged water exposure.
When you’re creating a statement wall that will define a space for years to come, think on the scale of a landmark project. Installing a large-scale glass mural is an investment in creating a powerful, permanent feature that will leave a lasting impression on every visitor.
Want to see the quality craftsmanship for yourself? Take a peek behind the scenes with us.
Frequently Asked Questions
Question : How much do large-scale glass prints typically weigh?
Answer : Glass prints are surprisingly lightweight for their size, often weighing less than a traditionally framed piece of the same dimensions. An Extra Large print (21.6” x 28.8”) typically weighs around 10-12 pounds, well within the capacity of standard wall anchors.
Question : Can multiple large prints be aligned to create a seamless mural?
Answer : Yes, this is a popular technique for creating massive art installations. By arranging multiple prints in a tight grid, you can form a larger, cohesive image. Achieving a seamless look with minimal gaps requires precise measurements and professional installation.
Question : What is the warranty policy for large commercial orders?
Answer : Reputable providers offer a satisfaction guarantee on all their products. For large commercial orders, it’s always a good idea to discuss specific warranty details and replacement policies for any potential shipping damage directly with your account rep..
Question : How far in advance should a large commercial art project be planned?
Answer : For a large-scale project, a 4-6 week timeline is recommended. This allows ample time for consultation, image preparation, production, shipping, and scheduling a professional installer without rushing any critical steps.


Comments